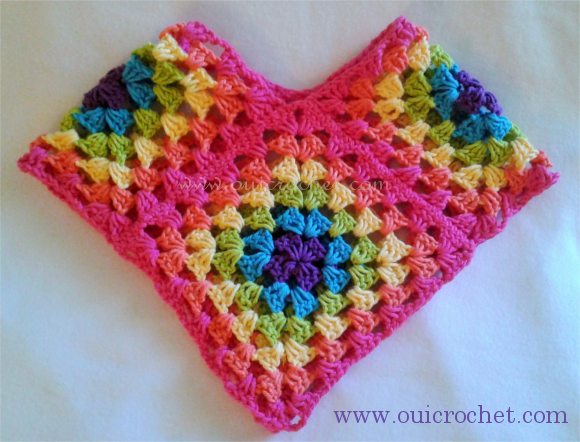
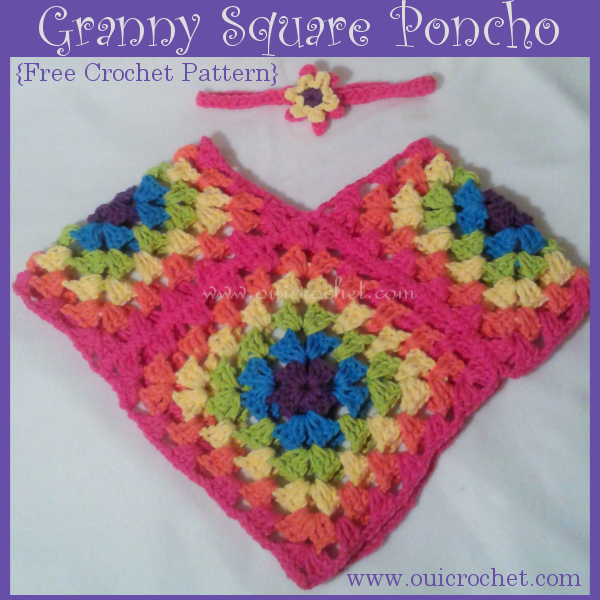
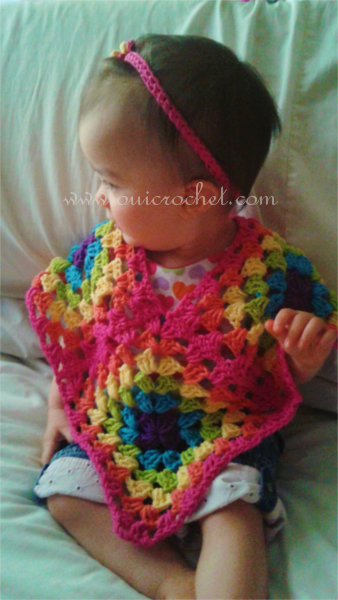
I recently made this cute little crochet granny square poncho pattern for my 1-year-old daughter. I paired the poncho with a modified version of my crochet Preemie Headband 1.
I was making a rainbow colored granny square for my Classic Granny Square Stitch Tutorial, and figured I would make a few more! I made six or seven of them, but this poncho only used four.
(I will be sharing what I did with the others, soon.)
This poncho is incredibly easy to make. It is a matter of making the 4 granny squares and sewing them together. That’s it. You could add a simple trim around the neck, but it isn’t necessary.
The headband modifications were very easy, too. I used an I hook instead of the F, and I made it larger. (Check out my Hat and Headband Size Chart if you need a reference). I also used the Deluxe Loopy Flower Applique, instead of the simple one. That’s it.
This adorable little set can be worked up in one afternoon!
Crochet Granny Square Poncho
Supplies:
Size I crochet hook
Worsted weight yarn- I used 100% cotton in pink, orange, yellow, green, blue, and purple
Yarn needle
Pattern:
Granny Squares: (make 4)
With color A, Ch 4, join with slip stitch to first ch to form a ring.
Round 1: Ch 3 (counts as dc here, and throughout), 2 dc in ring, ch 3, [3 dc in ring, ch 3] three times. Join with slip st to top of beginning ch 3. Finish off. (12 sts)
Round 2: Join color B to the next ch 3 corner. Ch 3, 2 dc in same ch 3 space, ch 2, [(3 dc, ch 3, 3 dc) in the next ch 3 space, ch 2] three times. 3 dc in the same ch 3 space as the first st, ch 3, join with sl stitch to the top of beginning ch 3. Finish off. (24 sts)
Round 3: Join color C to the next ch 3 corner. Ch 3, 2 dc in same ch 3 space, [ch 2, 3 dc in next ch 2 space, ch 2, (3 dc, ch 3, 3 dc) in the next ch 3 corner] three times. Ch 2, 3 dc in next ch 2 space, ch 2, 3 dc in the same ch 3 space as the first st, ch 3, join with sl stitch to the top of beginning ch 3. Finish off. (36 sts)
Round 4: Join color D to the next ch 3 corner. Ch 3, 2 dc in same ch 3 space, [ch 2, 3 dc in each ch 2 space across, ch 2, (3 dc, ch 3, 3 dc) in the next ch 3 corner] three times. Ch 2, 3 dc in each ch 2 space across, ch 2, 3 dc in the same ch 3 space as the first st, ch 3, join with sl stitch to the top of beginning ch 3. Finish off. (48 sts)
Rounds 5 & 6: Repeat round 4.
Weave in all ends.
Assembly:
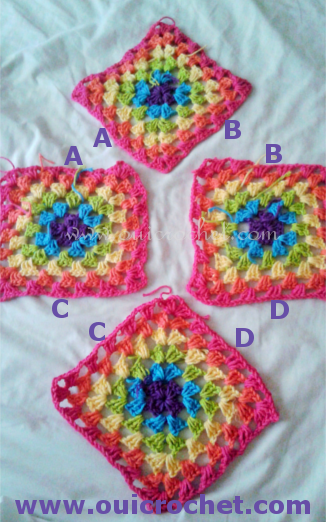
Using the same color yarn as your final round, thread your yarn needle and sew the sides together according to the photo below. Just match up the letters, and sew them together.