
Do you find it more difficult to be inspired to crochet during the hot summer months? I sometimes do. Last summer, I don’t think I picked up my hook more than a couple of times! This year, is different, though. I have been crocheting a lot. To keep up my motivation, I have been making smaller projects, and using a lot of cotton yarns. This is MUCH cooler than crocheting an afghan in 100+ degree heat!
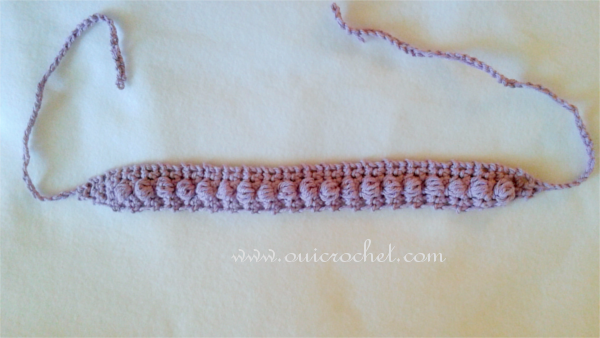
Lately, I have been making tie headbands for my daughters. Here is my Puff Stitch Tie Headband. I will be sharing the others soon.
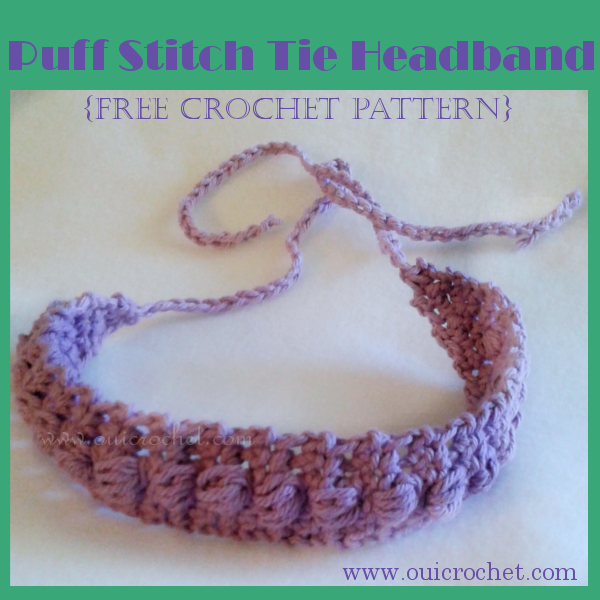
Two things really stand out about this Puff Stitch Headband. The first thing is that it ties. The ties allow the headband to fit multiple sizes. No measuring and no guesswork. The second thing is the crochet puff stitch. The puff stitch is fun to work with, and adds a lot of texture to a project. I like using it in accessories, as well as in crochet jewelry. I think it gives the piece an extra “pop”. This Puff Stitch Headband would look great paired with my Puff Stitch Bracelet in coordinating colors!
Puff Stitch Crochet Tie Headband
Supplies:
Size I crochet hook
Worsted weight cotton yarn
Special Instructions: Puff Stitch (ps): [yo, pull up loop] 4 times (9 loops on hook), yo and pull through 8 loops, yo, pull through 2 loops, push puff to front of work and go on to work next stitch.
Pattern:
Ch 42
Row 1: sc in 3rd (skipped ch counts as sc) ch from hook. Turn. (2)
Row 2: ch 1, 2 sc in first sc, sc in top of skipped ch. Turn. (3)
Row 3: ch 1, 2 sc in first sc, sc 2. Turn. ( 4 )
Row 4: ch 1, 2 sc in first sc, sc 3. Turn. ( 5)
Row 5: ch 1, sc 2, ps, sc 2, Turn. (5)
Row 6: ch 1, sc 4, sc in the top of turning ch. Turn. (5)
Row 7-29: repeat rows 5&6.
Row 30: ch 1, sc2tog, sc 3. Turn. (4)
Row 31: ch 1, sc2tog, sc 2. Turn. (3)
Row 32: ch 1, sc2tog, sc 1. Turn. (2)
Row 33: ch 1, sc2tog. Turn. (1)
Ch 40
Finish off and weave in ends.
Before you leave, I’d like to invite you to check out Fiber Tuesdays Link Party! Come on by and link your fiber arts projects!